Executive Summary (TL;DR)
First-hand operational walkthrough on connecting a US-entity Shopify store to the official OpenAI ChatGPT Ads app, completing OAuth authorization, and binding OpenAI Pixel for Shopify.
What We Completed in This Walkthrough
First, let us clarify the scope of this operational record: this is a step-by-step account and pixel connection log rather than a post-campaign conversion attribution report.
In the admin panel of a US-entity Shopify store (where US Shopify Payments had already been activated), I completed the following steps:
• Located and installed the official ChatGPT Ads app (verified developer: OpenAI) from the Shopify App Store;
• Opened the app onboarding screen inside Shopify Admin, redirected to OpenAI, and completed account login and OAuth permission approval;
• Selected the accessible ChatGPT business ad account upon returning to Shopify, and bound OpenAI Pixel for Shopify under the Data Sharing dropdown;
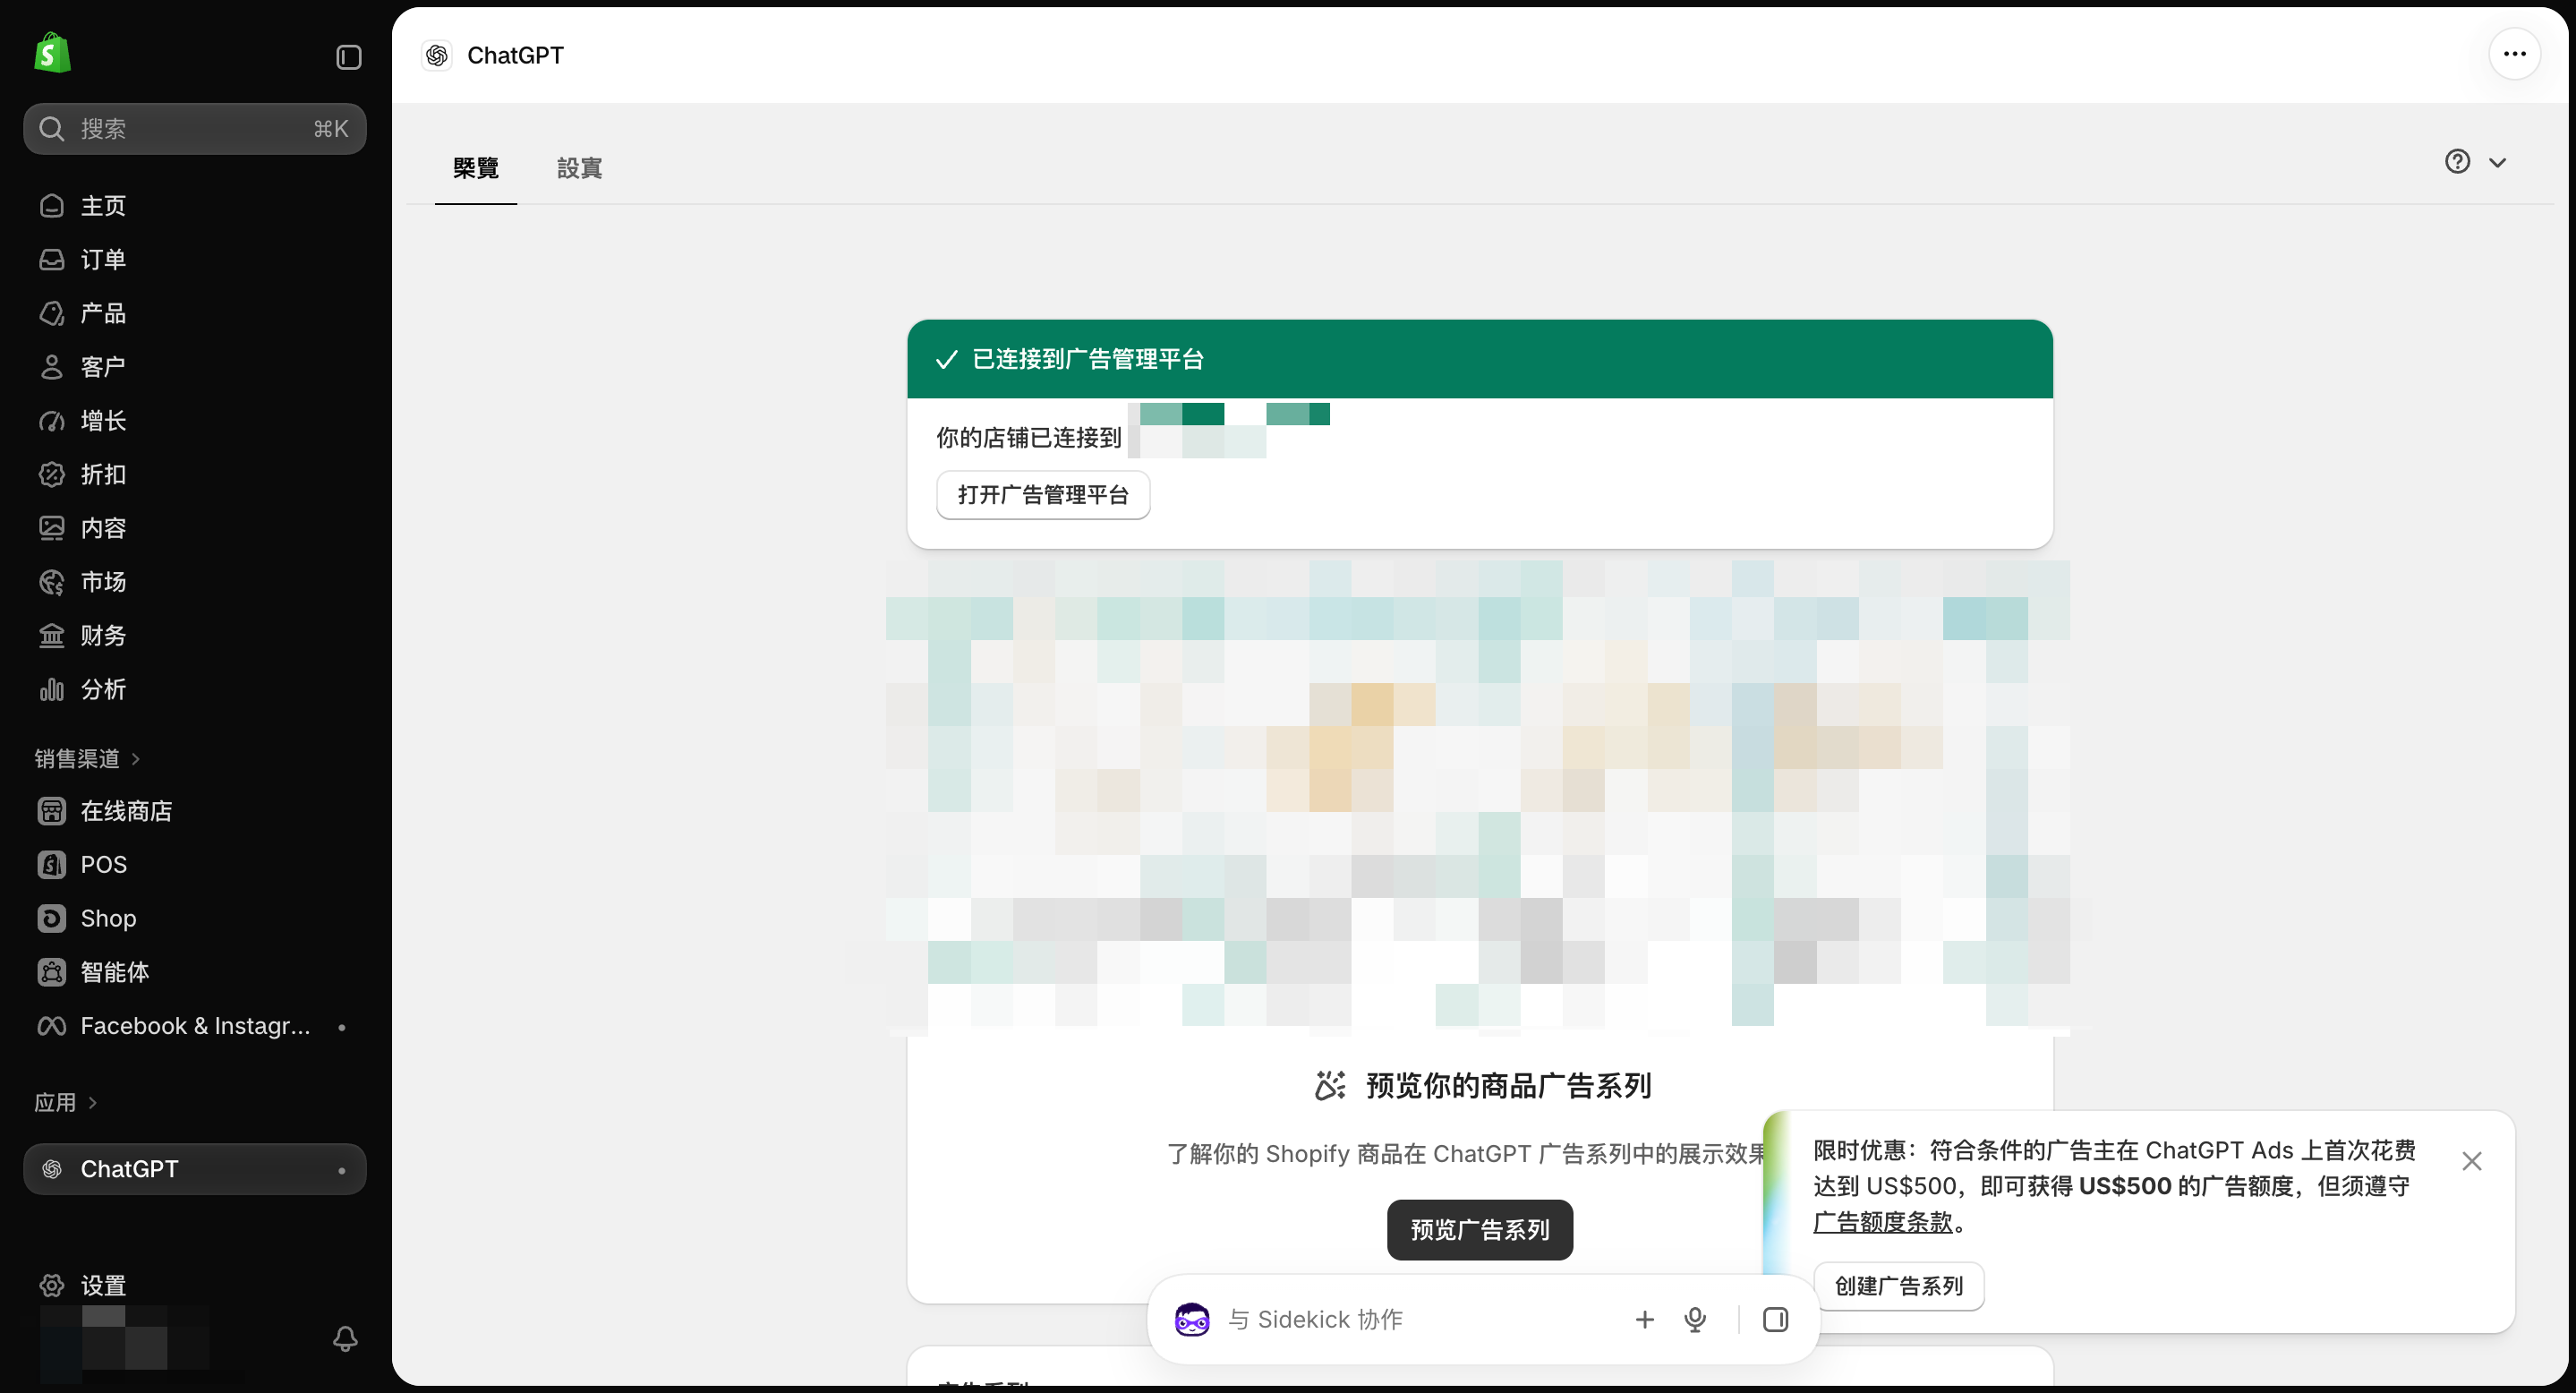
• Reached the final app overview screen displaying the green status banner '✓ Connected to Ads Manager'.
Before You Start: Ad Account Eligibility, App Scope & Pixel Setup Methods
When evaluating ChatGPT Ads integration, merchants often conflate three separate layers: Ad Account eligibility, official Shopify app availability, and technical pixel installation.
1. Ads Manager Account Eligibility: Whether you can open and run a ChatGPT Ads Manager account depends on advertiser entity region and OpenAI's availability list.
2. Official Shopify App Availability: OpenAI's Shopify integration guide specifies that the native app integration is currently open to US Shopify merchants.
3. Technical Pixel Installation: OpenAI provides Measurement Pixel documentation for custom web conversion tracking, which does not replace ad account eligibility.
Step-by-Step Screenshots: From App Installation to OAuth Authorization
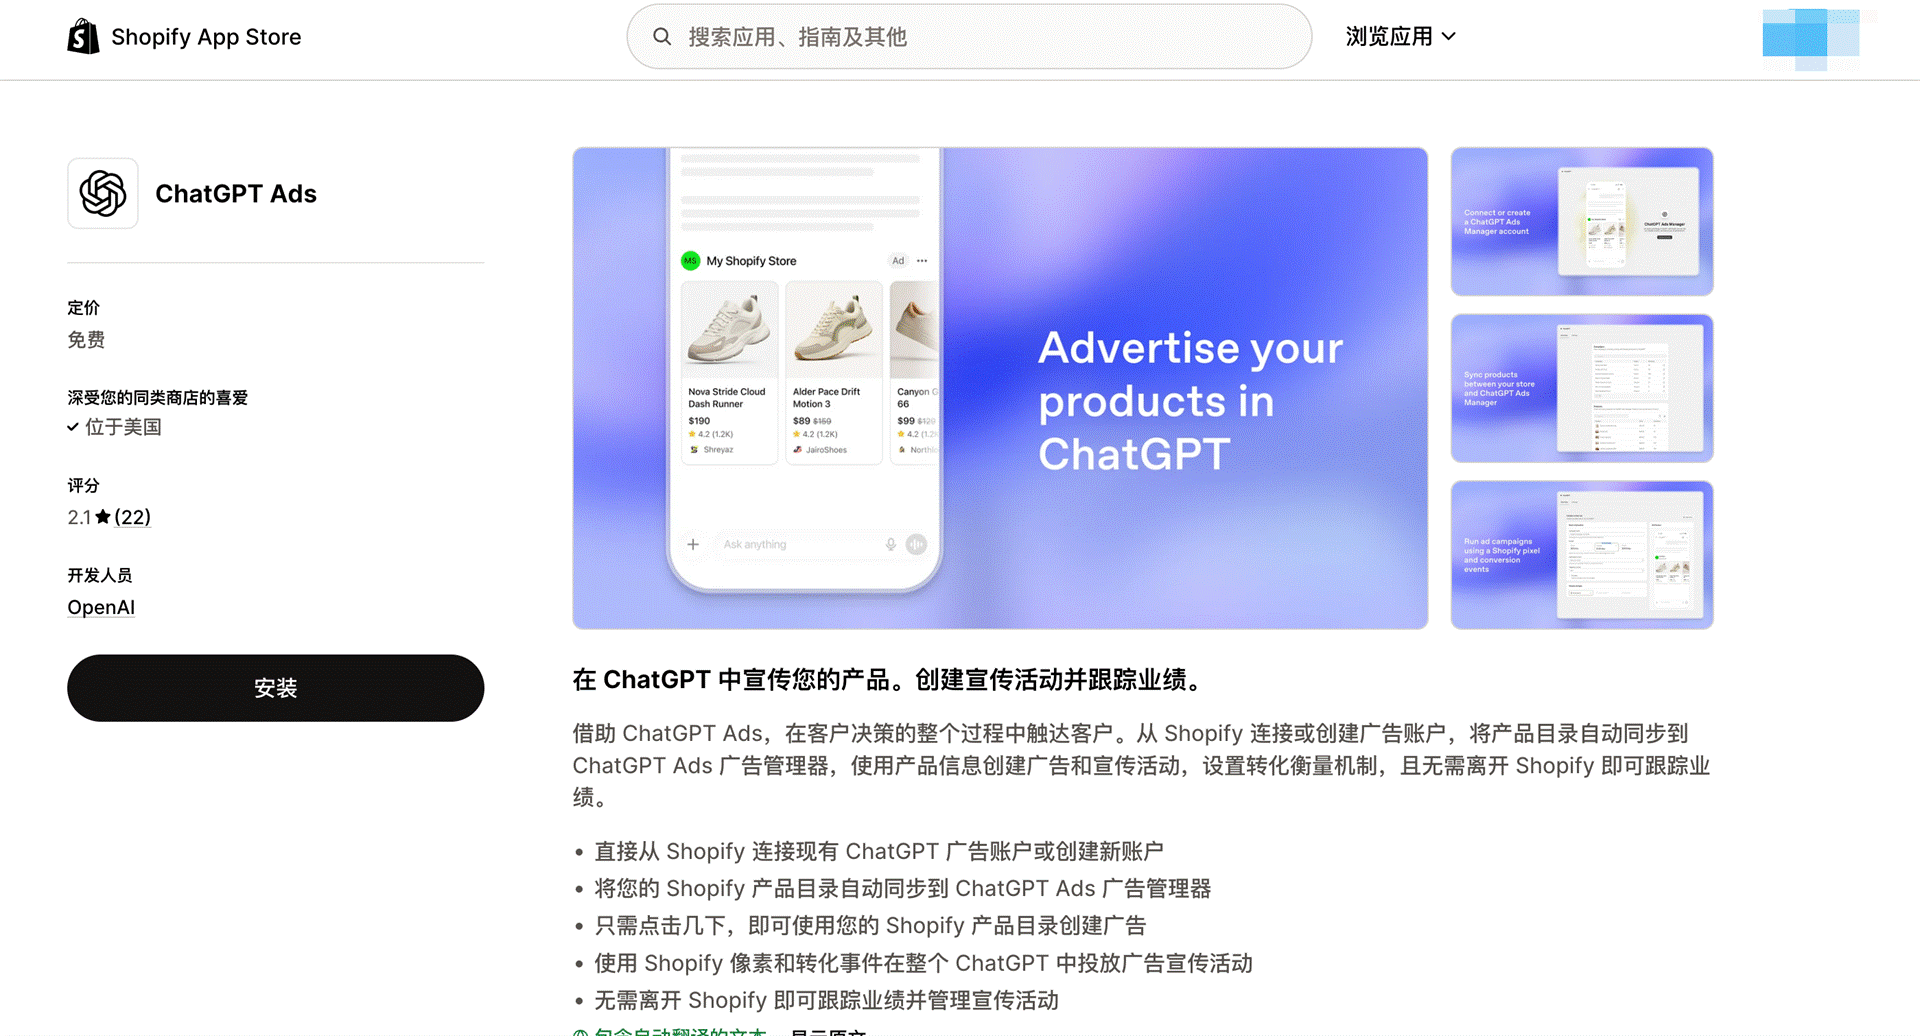
Step 1: Search for 'ChatGPT Ads' in the Shopify App Store, confirm that the developer is listed as OpenAI, and click Install.
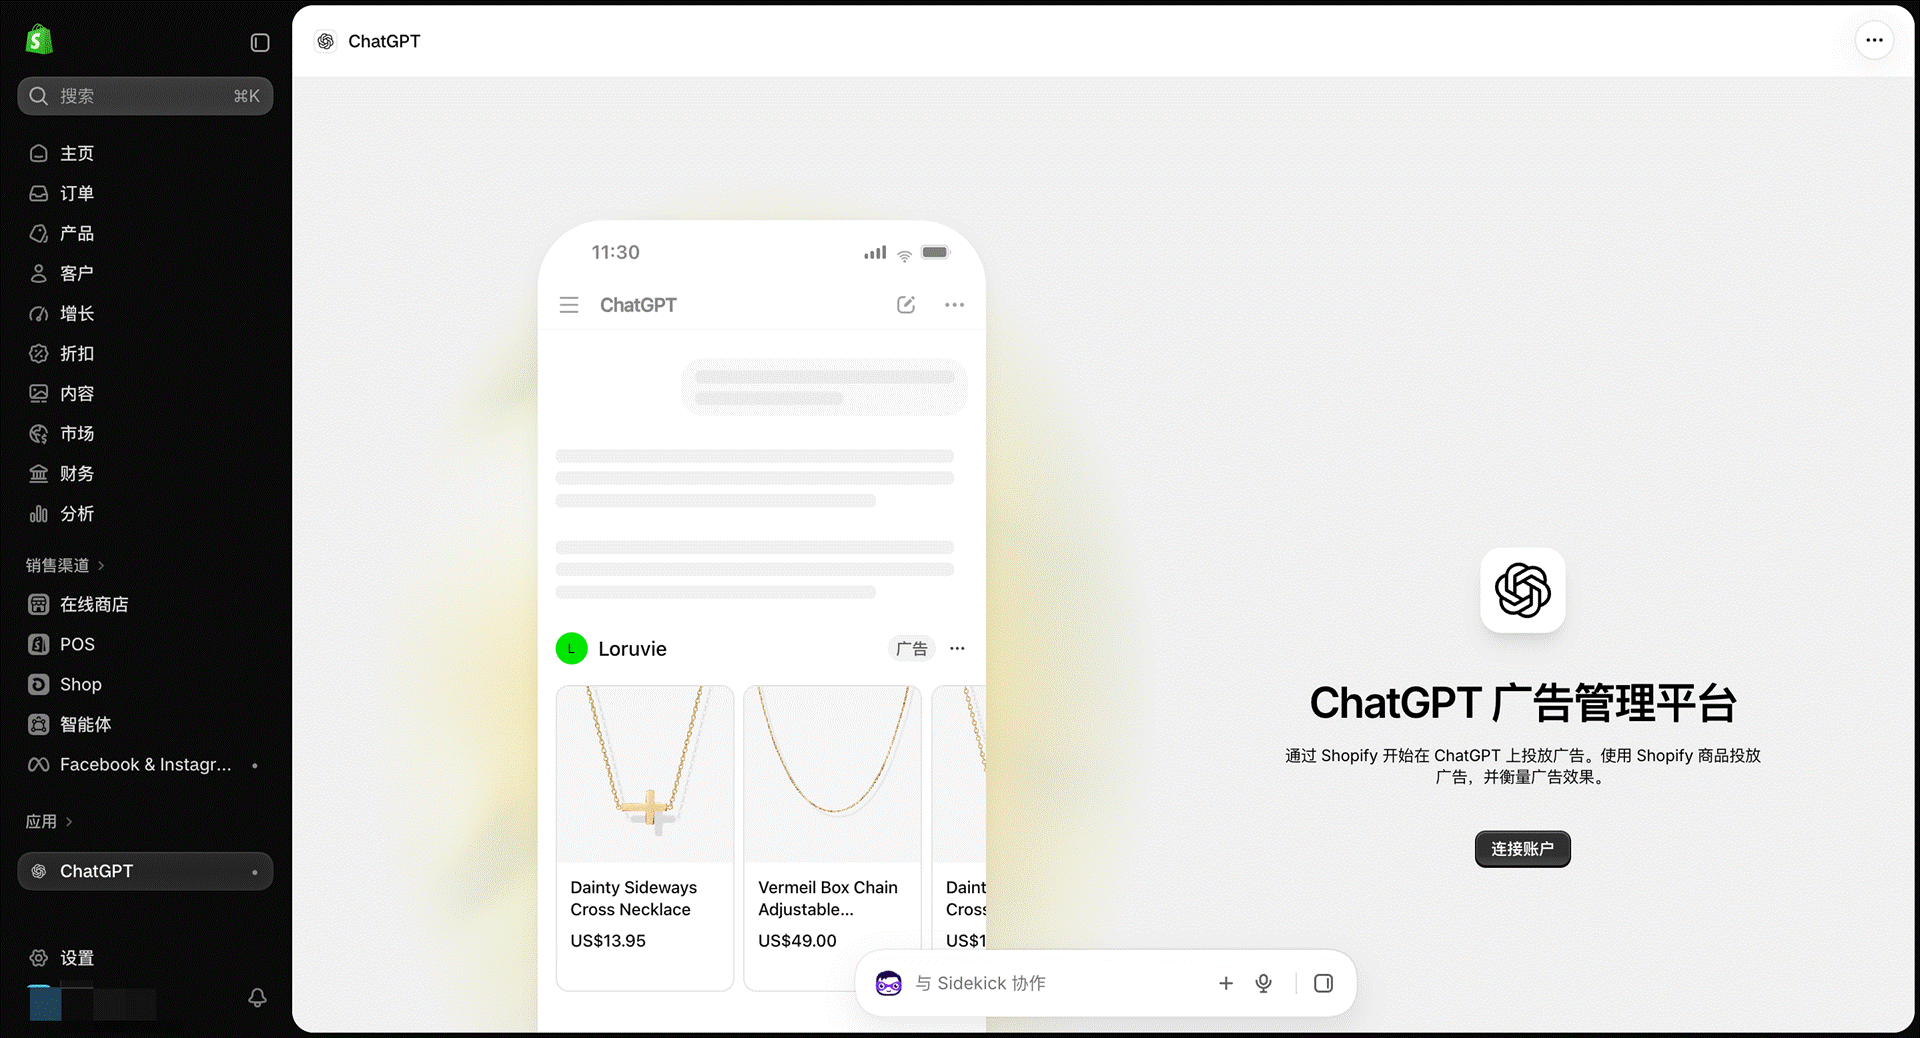
Step 2: Open Apps → ChatGPT inside Shopify Admin and click 'Connect account' on the welcome card.
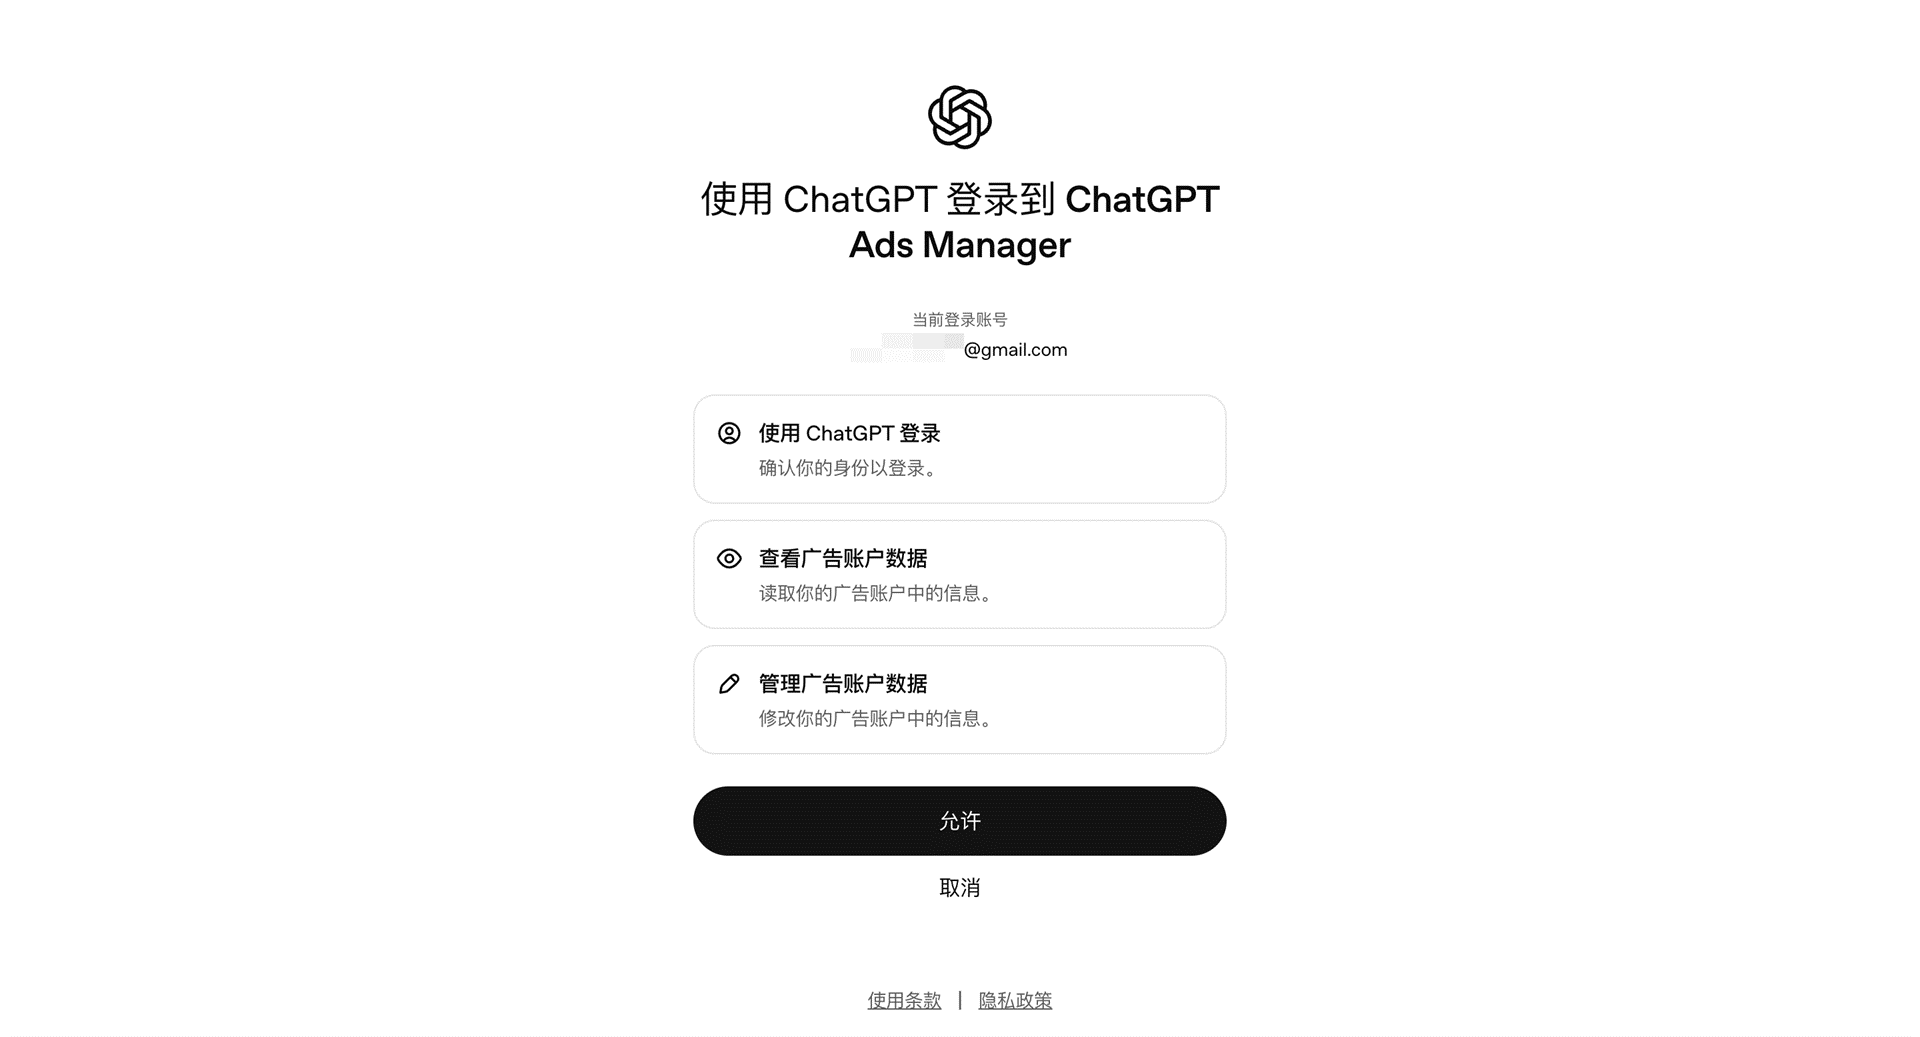
Step 3 & Step 4: Sign in with the OpenAI account used for ad management and confirm the three OAuth permissions.
Selecting the ChatGPT Ad Account & Binding OpenAI Pixel for Shopify
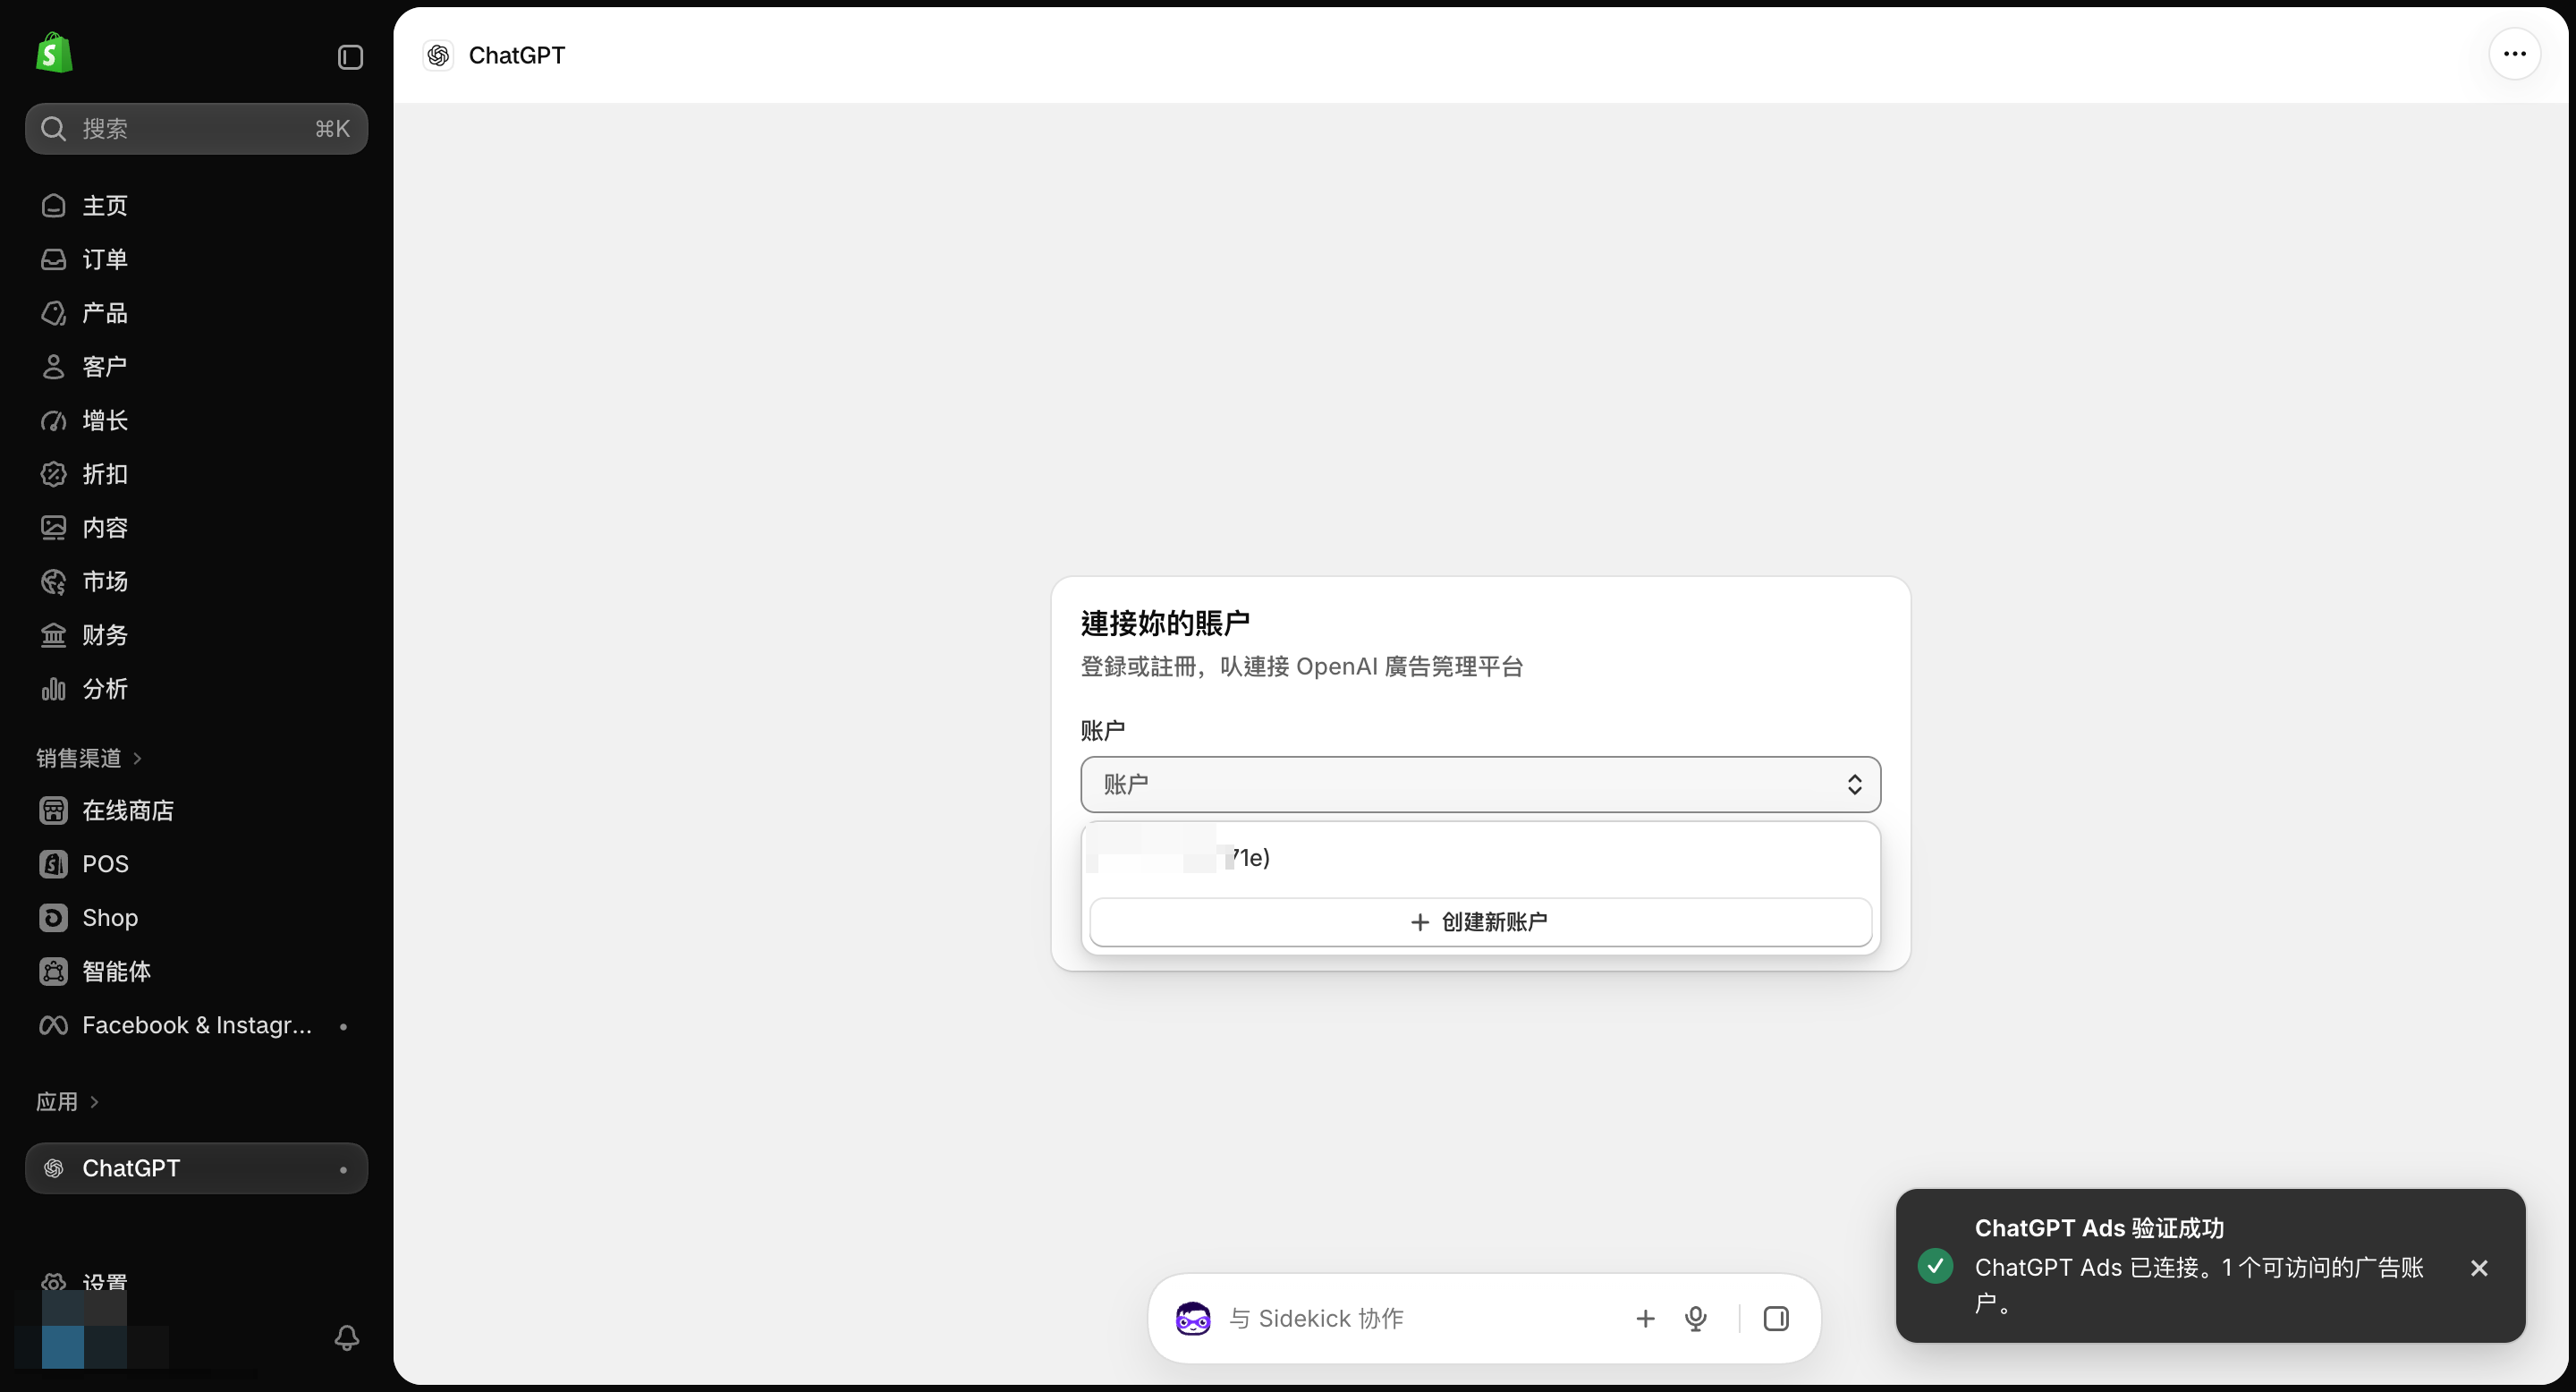
Step 5: After OAuth approval redirects back to Shopify Admin, select the target business ad account from the Account dropdown.
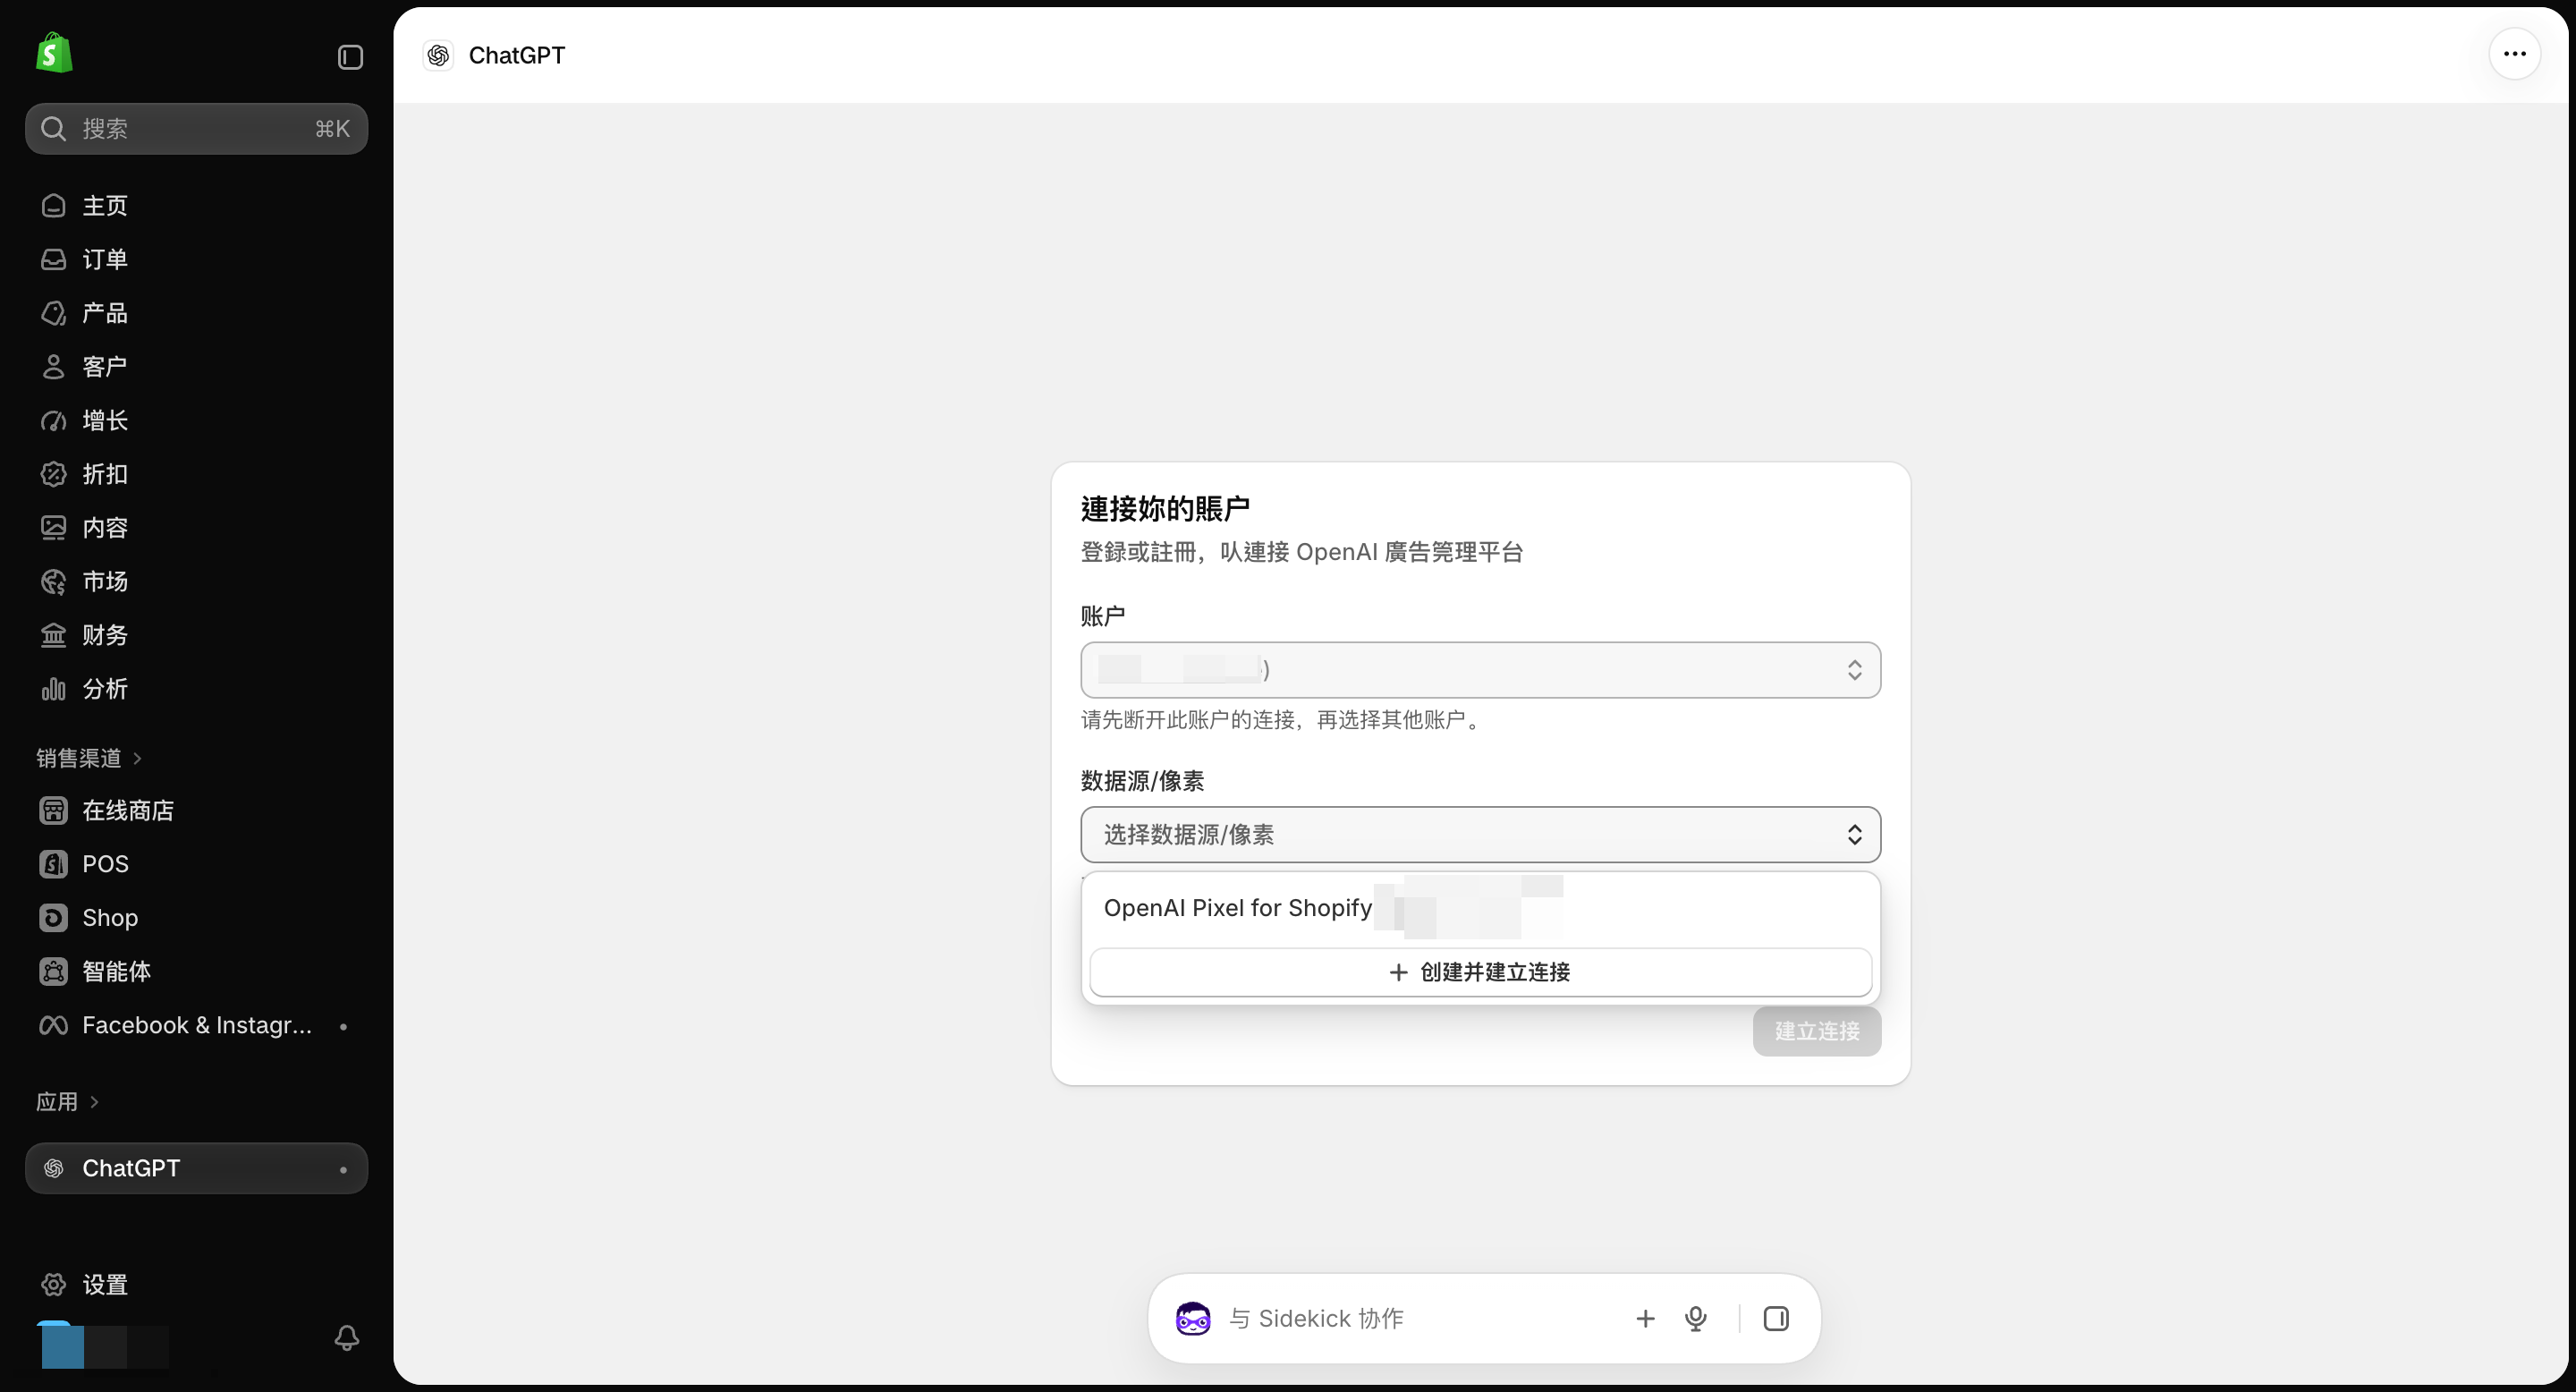
Step 6: Under the 'Data source / Pixel' dropdown on the same card, select 'OpenAI Pixel for Shopify' and click 'Connect' in the bottom-right corner.
Verifying the '✓ Connected to Ads Manager' Status & Credit Terms
Step 7: Once connected, the top status bar in Shopify Admin updates to a green banner: '✓ Connected to Ads Manager', alongside a button to open ChatGPT Ads Manager directly.
Post-Connection Checklist & Operations Archiving
1. Check Product Catalog Sync: Open ChatGPT Ads Manager 24 hours after binding to verify product feed ingestion counts and review statuses;
2. Verify Conversion Event Reception & Deduplication: Trigger test page views, add-to-cart, and checkout events to confirm reception in Event Diagnostics;
3. Archive Store Entity, Ad Account ID, and Pixel ID in Simbatch Assets & Content Hub.